Hands-on school projects encourage children to think creatively, solve problems, and learn through experience. Among the many STEM and craft activities available for young learners, one project has become a favorite in classrooms, makerspaces, after-school clubs, and homes around the world: building a DIY cardboard pinball machine. Using recycled cardboard, simple craft supplies, and a few inexpensive materials, children can create a working tabletop game that combines engineering, art, mathematics, physics, and imaginative design.
Unlike ordinary craft projects, a cardboard pinball machine is both something children build and something they can continue playing with after it is finished. Every ramp, bumper, obstacle, and launcher is designed by the children themselves, making each machine completely unique. The excitement of launching a marble and watching it bounce through the handmade course keeps children engaged while teaching valuable scientific concepts in a fun and memorable way.
Teachers and parents appreciate this project because it encourages creativity without requiring expensive materials. At the same time, children learn how everyday recycled objects can become exciting inventions. Building a cardboard pinball machine shows young learners that innovation begins with imagination, teamwork, and a willingness to experiment.
Why Children Love This Project
Children naturally enjoy games, especially those they build themselves. A cardboard pinball machine combines crafting with interactive play, making it one of the most rewarding classroom projects.
There are many reasons why children love this activity.
They enjoy constructing something that actually works.
They love decorating the game with their own ideas.
Testing different designs feels like solving exciting puzzles.
Each successful improvement makes the game more enjoyable.
Finally, children can challenge friends and family members after completing the project, giving the machine a long life beyond the classroom.
The combination of designing, building, decorating, and playing keeps students motivated from beginning to end.
Educational Objectives
Although the project feels like a game, it supports learning across many subjects.
Students develop:
- Creativity
- Engineering thinking
- Scientific observation
- Mathematical reasoning
- Fine motor skills
- Problem-solving
- Teamwork
- Communication
- Patience
- Persistence
- Design skills
- Environmental awareness
Project-based learning becomes much more engaging when children create something they genuinely enjoy using.
Materials Needed
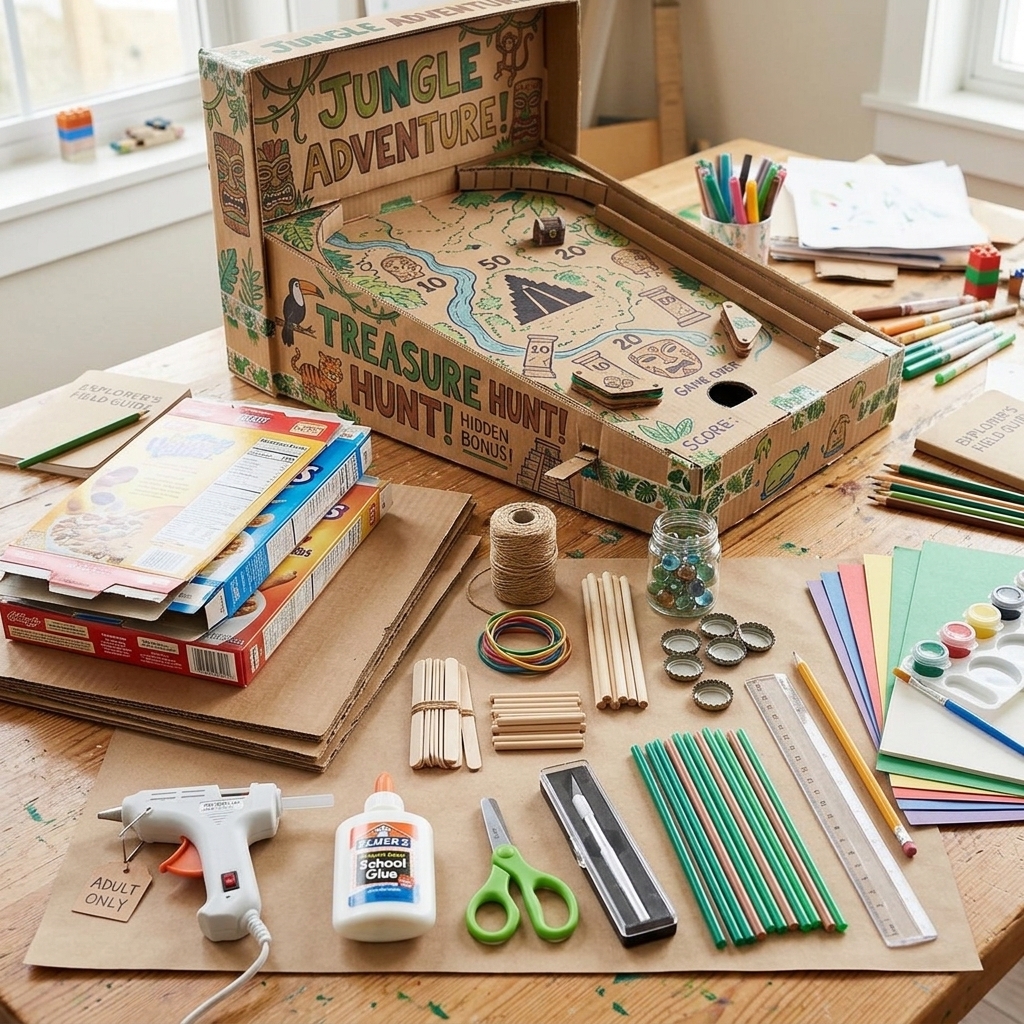
Most supplies can be found at home or in school.
Essential materials include:
- Thick cardboard
- Empty cereal boxes
- Hot glue (adult use)
- White glue
- Masking tape
- Child-safe scissors
- Craft knife (adult use)
- Wooden craft sticks
- Drinking straws
- Rubber bands
- Bottle caps
- Marbles
- Markers
- Acrylic paint
- Colored paper
- Ruler
- Pencil
- Small wooden dowels
- String
Optional decorations include:
- Stickers
- Washi tape
- Foam sheets
- Glitter
- Googly eyes
- Printed labels
- LED lights
- Recycled plastic pieces
Understanding How Pinball Works
Before construction begins, teachers explain the basic idea behind a pinball machine.
A marble is launched onto a sloping board.
Gravity pulls it downward.
Obstacles change its direction.
Players score points when the marble hits targets before falling back to the bottom.
Children quickly understand these concepts because they can observe them directly while experimenting.
Planning the Design
Every successful project begins with careful planning.
Students sketch their machines before cutting cardboard.
They decide where to place:
- The launcher
- Bumpers
- Obstacles
- Ramps
- Tunnels
- Targets
- Score zones
- Exit path
Planning teaches organization and logical thinking.
Building the Base
The base is made from a large sheet of sturdy cardboard.
Small cardboard strips are glued underneath to create a gentle slope.
The angle must not be too steep or too flat.
Children test different heights until the marble rolls smoothly.
This stage introduces simple engineering concepts through experimentation.
Creating the Side Walls
The walls keep the marble inside the game.
Students measure and glue cardboard strips along the edges.
They quickly discover that strong walls improve gameplay.
If the walls are too low, the marble may roll out.
If they are too high, decorating becomes more difficult.
Testing helps students improve their designs.
Building the Launcher
The launcher is one of the most exciting parts of the machine.
A simple design uses:
- Rubber bands
- Craft sticks
- A cardboard guide
- A wooden dowel
Pulling the launcher backward stores energy.
When released, the marble shoots onto the playing field.
Children are fascinated by this simple example of stored and released energy.
Designing Obstacles
The heart of every pinball machine is its obstacle course.
Children invent creative features such as:
- Zigzag walls
- Curved ramps
- Bottle-cap bumpers
- Straw tunnels
- Cardboard bridges
- Moving gates
- Spinning wheels
- Mini mazes
Every obstacle changes how the marble travels.
This encourages experimentation and redesign.
Adding Targets
Targets make the game more exciting.
Ideas include:
Bottle caps
Paper cups
Cardboard circles
Foam blocks
Small boxes
Color-coded zones
Each target can receive a different point value.
Students enjoy creating their own scoring systems.
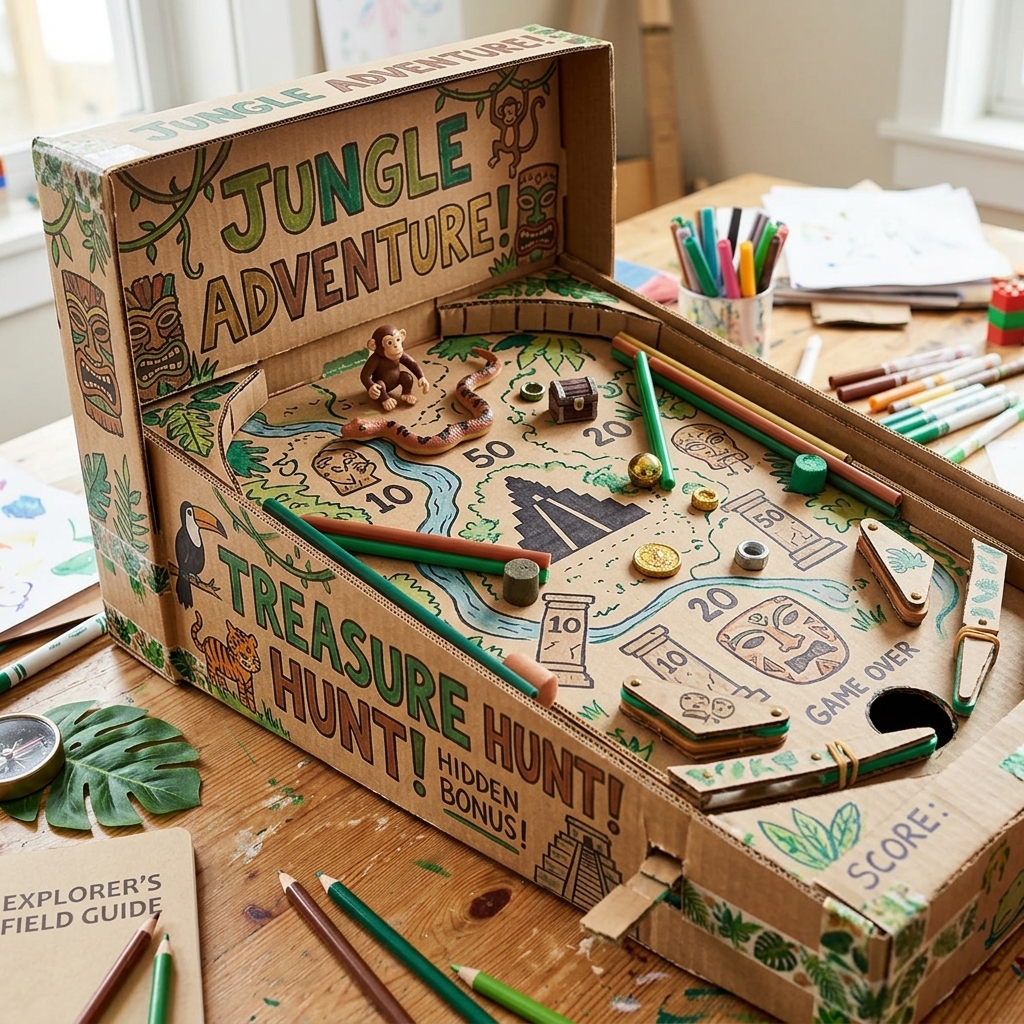
Decorating the Machine
Now creativity takes center stage.
Children choose exciting themes.
Popular ideas include:
- Space Adventure
- Dinosaur World
- Pirate Treasure
- Jungle Safari
- Candy Land
- Underwater Ocean
- Medieval Castle
- Robot Factory
- Racing Track
- Superhero City
Paint, stickers, markers, and colorful paper transform plain cardboard into vibrant game boards.
Learning Through Physics
As children play, they naturally explore important scientific concepts.
They observe:
Gravity
Force
Speed
Friction
Energy
Momentum
Angles
Collisions
Instead of memorizing definitions, students experience these ideas through play.
Learning becomes meaningful and memorable.
Mathematical Connections
The project also supports mathematics.
Students measure:
Lengths
Angles
Distances
Heights
They calculate:
Scores
Point totals
High scores
Probability
Simple averages
Teachers can organize score charts to practice addition and comparison.
Encouraging Problem-Solving
No machine works perfectly on the first attempt.
Children often discover problems.
Perhaps:
The marble gets stuck.
The launcher is too weak.
The ramps are too steep.
Targets fall over.
Walls bend.
Each challenge becomes an opportunity to improve the design.
This engineering process teaches resilience and critical thinking.
Developing Fine Motor Skills
Constructing the machine strengthens hand coordination.
Students practice:
Drawing
Cutting
Folding
Gluing
Painting
Measuring
Positioning pieces carefully
These actions improve precision and control.
Teamwork During Construction
Group projects encourage cooperation.
Students divide responsibilities.
One child measures.
Another cuts cardboard.
Someone else paints.
Others test the game repeatedly.
Sharing ideas teaches communication and respect.
Classroom Competitions
Once every machine is complete, teachers may organize friendly competitions.
Categories include:
Highest score
Most creative design
Best engineering
Fastest marble path
Most colorful machine
Best teamwork
Most challenging course
Celebrating different achievements allows every child to succeed.
Environmental Awareness
The project demonstrates the value of recycling.
Instead of throwing cardboard away, children transform it into an exciting game.
Teachers discuss:
Reducing waste
Reusing materials
Protecting resources
Creative recycling
Sustainable living
Students begin viewing recyclable materials as valuable building supplies.
Creative Variations
The basic machine can be customized in countless ways.
Ideas include:
Animal theme
Space theme
Farm theme
Ocean adventure
Ancient Egypt
Outer space mission
Treasure hunt
Sports stadium
Haunted house
Fantasy kingdom
Every new theme inspires different decorations and obstacle designs.
Home Extension Activities
Families can continue improving the machine together.
Children may:
Build additional ramps.
Add moving obstacles.
Create electronic scoreboards.
Decorate new themes.
Invent new rules.
Challenge siblings.
Record tournament scores.
These activities strengthen family bonds while encouraging creativity.
Safety Guidelines
Teachers should establish simple safety rules.
Children should:
Use scissors carefully.
Ask adults to use craft knives.
Handle hot glue with supervision.
Keep marbles away from very young children.
Maintain tidy workspaces.
Wash hands after painting.
A safe environment allows everyone to enjoy the project.
Assessing Student Learning
Teachers evaluate more than the finished product.
Assessment may include:
Creativity
Planning
Participation
Problem-solving
Cooperation
Engineering improvements
Presentation skills
Reflection
The learning process is just as important as the final machine.
Presenting the Finished Projects
Each team introduces its pinball machine to the class.
Students explain:
Their theme
How the launcher works
Which obstacles were most difficult
How they solved problems
What they learned
What they would improve next time
Presentations strengthen speaking confidence and communication skills.
Skills Developed
By the end of the project, children have strengthened numerous lifelong abilities.
These include:
Critical thinking
Creativity
Engineering awareness
Scientific reasoning
Artistic expression
Mathematical understanding
Communication
Collaboration
Patience
Confidence
Innovation
Environmental responsibility
These skills extend far beyond the classroom.
Long-Term Educational Benefits
Unlike worksheets that are completed and forgotten, the cardboard pinball machine remains useful.
Teachers can use it for:
Science lessons
Mathematics games
Engineering demonstrations
Class competitions
Open play
STEM fairs
Maker events
Family activity nights
The project continues supporting learning long after construction ends.
Tips for Teachers
Successful projects usually include:
Preparing materials beforehand.
Demonstrating each construction stage.
Allowing creative freedom.
Encouraging experimentation.
Celebrating improvement instead of perfection.
Providing enough testing time.
Displaying completed machines during school exhibitions.
These simple practices create a positive and motivating learning environment.
Conclusion
Building a DIY cardboard pinball machine is one of the most exciting educational projects children can experience. It transforms simple recycled materials into an engaging game while introducing important concepts from science, engineering, mathematics, art, and environmental education. Throughout the construction process, children learn to plan carefully, solve problems creatively, work cooperatively, and improve their ideas through experimentation.
The completed machine is much more than a craft—it is a functioning invention that rewards curiosity, imagination, and persistence. Every launch of the marble reminds children that their own ideas and hard work created something entertaining and educational. Whether used in classrooms, STEM clubs, libraries, community centers, or at home, this project inspires young inventors to keep exploring how things work and how simple materials can become extraordinary creations.
Most importantly, children discover that innovation does not require expensive equipment or advanced technology. A few pieces of cardboard, a marble, some recycled materials, and a creative mind are enough to build a game that brings laughter, learning, and lasting memories. Through this enjoyable project, students develop practical skills, strengthen their confidence, and gain a deeper appreciation for teamwork, recycling, and the exciting world of engineering.