Skip to content
MiNi SaVoIr

  • Home
  • Activités
  • Créativité
  • Jeux & Activités
  • Bricolage
  • CONTACTEZ-NOUS
  • Home
  • Activités
  • Créativité
  • Jeux & Activités
  • Bricolage
  • CONTACTEZ-NOUS
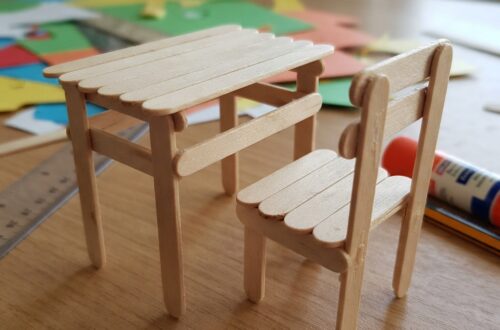
  • # A Small School Table and Chair Made of Wooden Sticks Making a small school table and chair from wooden sticks is a simple, creative, and educational craft project for children. With a few wooden craft sticks, glue, cardboard, paper, and some imagination, it is possible to create a miniature classroom scene. This project is especially interesting because it transforms simple materials into familiar objects that children see every day at school. The finished table and chair can be used as part of a miniature classroom, dollhouse, school project, or creative display. A miniature school table and chair made from wooden sticks can also introduce children to basic ideas about construction, measurement, balance, design, and organization. While the project looks like a small craft, it requires planning and careful assembly. Children learn that even a simple piece of furniture needs a strong structure to remain stable. ## Understanding the Project A school table and chair are important pieces of classroom furniture. Students use tables for writing, reading, drawing, and completing school activities. Chairs allow them to sit comfortably while learning. Creating miniature versions of these objects gives children an opportunity to understand how furniture is constructed. Wooden craft sticks are especially useful because they are lightweight, easy to arrange, and strong enough for small models. The project can be adapted to different ages. Younger children can make a basic table and chair with adult assistance, while older children can create more detailed models with tabletops, legs, backrests, shelves, and decorations. The finished furniture does not need to be perfectly realistic. The main purpose is to encourage creativity and teach children how different pieces can be joined together to create a stable structure. ## Materials Needed The main material for the project is wooden craft sticks. These can be ordinary flat wooden sticks or slightly thicker craft sticks. The number needed depends on the size and design of the model. Other materials include strong craft glue, cardboard, a ruler, a pencil, scissors, paper, markers, and paint. Cardboard can be used as a base to make the furniture more stable. Small pieces of ribbon, colored paper, stickers, or foam can be used for decoration. If children want to create a complete miniature classroom, additional materials can include bottle caps, cardboard boxes, paper, and recycled packaging. It is useful to prepare all materials before construction begins. Keeping everything nearby makes the activity easier and more organized. ## Planning the Design Planning is an important part of building miniature furniture. Before gluing the wooden sticks together, children should decide how the table and chair will look. A simple drawing can show the tabletop, legs, and supports. Another drawing can show the chair seat, legs, and backrest. The proportions should be considered carefully. The chair should be smaller than the table, and the table should be wide enough to look comfortable for a miniature student. Using a ruler helps children create pieces that are similar in length. Accurate measurements can make the final model more balanced. ## Making the Tabletop The tabletop is usually the first part of the miniature table to build. Several wooden sticks can be placed next to each other horizontally to form a flat surface. Small wooden sticks can be glued across the underside as supports. These supports hold the main sticks together and prevent them from moving apart. The tabletop should be allowed to dry before the legs are attached. If the glue is still wet, the sticks may move out of position. For a different design, cardboard can be used as the tabletop and covered with wooden sticks. This can provide additional strength and make construction easier. ## Building the Table Legs The legs are responsible for supporting the tabletop. Four wooden sticks can be used as legs, one near each corner. The sticks should be attached vertically or at a slight angle, depending on the desired design. It is important to make sure that the legs are approximately the same length. Unequal legs can cause the table to wobble. Small horizontal supports can be added between the legs. These supports strengthen the structure and make the miniature table more realistic. The table should be placed on a flat surface during construction so that the legs can be adjusted before the glue dries. ## Adding Table Supports Real tables often contain supporting structures beneath the tabletop. A miniature table can include small wooden sticks connecting the legs. These supports can form a rectangle underneath the tabletop. They make the model stronger and demonstrate how structural support works. Children can observe that a table is not simply a flat surface with legs. Different parts work together to distribute weight and keep the furniture stable. This is a simple introduction to engineering concepts. ## Making the Chair Seat The chair can be made in a similar way. Several wooden sticks can be arranged side by side to create the seat. Two or more sticks can be placed underneath as supports. The seat should be smaller than the tabletop. Its size should also match the height of the miniature table. A cardboard seat can be used if children find it difficult to connect many wooden sticks. Wooden sticks can then be placed over the cardboard to create a natural wooden appearance. ## Building the Chair Legs Four wooden sticks can form the chair legs. They should be attached underneath the seat. The legs must be positioned carefully so that the chair can stand without falling. Additional horizontal supports can be placed between the legs. These supports make the chair stronger and can also give it a more realistic appearance. Children should test the chair on a flat surface before continuing. If it leans to one side, one of the legs may need to be repositioned. ## Creating the Chair Backrest A school chair usually has a backrest, and adding one makes the miniature model look more complete. Several wooden sticks can be placed vertically or horizontally to create the backrest. Two longer sticks can serve as side supports. The backrest should be attached securely to the back of the seat. Children can experiment with different patterns. For example, they can create a simple solid backrest or arrange the sticks in a decorative pattern. ## Decorating the Furniture Once the table and chair are structurally complete, children can decorate them. The wooden sticks can be left natural for a simple wooden appearance. They can also be painted in bright colors. A school table might be painted blue, green, yellow, or another favorite color. The chair can match the table or have a contrasting color. Small drawings or patterns can be added using markers. Children can also place a tiny paper book, pencil, or notebook on the table. Decorations should be added after the glue has completely dried. ## Creating a Miniature Classroom The small table and chair can become part of a larger classroom model. A cardboard box can serve as the classroom walls. Children can create several tables and chairs for miniature students. A teacher's desk, blackboard, bookshelf, classroom door, and windows can also be added. A small piece of black or dark-colored cardboard can become a chalkboard. Tiny pieces of paper can represent books and classroom posters. This larger project allows children to imagine what happens inside a classroom and how different objects are organized. ## Adding Miniature Students Tiny students can be made from paper, cardboard, modeling clay, or other craft materials. They can be placed on the chairs around the tables. Some can appear to be writing, while others can be reading or raising their hands. Adding students makes the classroom scene more lively. Children can also create a miniature teacher and place the figure near the teacher's desk. This can lead to storytelling activities in which children imagine a lesson taking place inside their handmade classroom. ## Educational Benefits The wooden-stick school furniture project provides many educational benefits. It develops creativity because children must imagine how simple sticks can become recognizable objects. It also improves fine motor skills. Picking up small sticks, applying glue, positioning pieces, and decorating the furniture require careful hand movements. The activity develops patience as well. Glue needs time to dry, and some parts may need to be adjusted before the model is finished. Children also practice problem-solving. If the table is unstable, they need to determine why and find a solution. ## Learning About Measurement The project provides a natural way to practice measurement. Children can measure the lengths of wooden sticks and compare the sizes of the table and chair. They can learn about concepts such as height, width, length, symmetry, and proportion. For older students, the project can become a simple mathematics activity. They might calculate how many sticks are needed or determine the difference between the height of the table and chair. This demonstrates how mathematics can be used in practical situations. ## Learning About Balance and Structure The project also introduces basic engineering concepts. A table must have a stable base, and its legs need to be positioned correctly. The same principle applies to the chair. If one leg is too short or poorly positioned, the chair may wobble. Children can experiment with different structures and observe which designs are stronger. This type of hands-on learning helps children understand that objects are designed according to practical principles. ## Using Recycled Materials Although wooden craft sticks are the main material, many other parts of the project can be made from recycled items. Old cardboard can become a classroom floor. Packaging can become walls, shelves, or books. Paper scraps can become posters and notebooks. Using recycled materials teaches children that useful craft supplies can often be found around the home. It also encourages environmental responsibility by showing that materials can be reused creatively. ## Working as a Group The project can be completed individually or as a group activity. In a classroom, students can work together to create a complete miniature school. One group can build tables and chairs, another can create the classroom walls, and another can make books, students, and decorations. Working together encourages communication and cooperation. Each student can contribute a different skill, making the final project a shared achievement. ## Common Challenges One common challenge is keeping the wooden sticks in place while the glue dries. Children can use small pieces of tape to temporarily hold them together. Another challenge is creating equal-length legs. Measuring the sticks before construction helps solve this problem. The table or chair may also become too heavy if too much glue or too many materials are used. Using only the necessary amount of material keeps the model light. If the furniture becomes unstable, extra supports can be added underneath. These challenges are valuable because they encourage children to experiment and improve their designs. ## Safety Tips Children should use scissors and craft materials carefully. Young children may need adult assistance when cutting cardboard or using certain types of glue. Glue should be used in a well-ventilated area and according to its instructions. Hot glue guns should only be handled by adults or used under close adult supervision. Wooden sticks should be checked to ensure that they are smooth and free from sharp splinters. A clean work surface makes the project safer and easier to manage. ## Conclusion A small school table and chair made from wooden sticks is a wonderful craft project that combines creativity, education, and simple construction. With a few wooden sticks, glue, cardboard, and decorative materials, children can create miniature furniture that resembles the tables and chairs found in a real classroom. The activity teaches much more than crafting. Children learn about measurement, balance, structure, proportion, organization, and problem-solving. They also develop fine motor skills and patience as they carefully position and glue each piece. The finished table and chair can stand alone as a miniature display or become part of a larger school model. Children can add a blackboard, teacher's desk, books, students, shelves, and other classroom objects to create a complete miniature learning environment. Perhaps the most valuable lesson is that simple materials can be transformed through creativity. A collection of ordinary wooden sticks can become useful-looking furniture when the pieces are carefully planned and assembled. This encourages children to look at everyday materials in new ways. Whether made at home, in a classroom, or as part of a school exhibition, a wooden-stick school table and chair provide an enjoyable hands-on experience. The project combines art with practical learning and gives children the satisfaction of creating something with their own hands. In the end, the tiny table and chair are not only attractive handmade objects but also examples of creativity, patience, teamwork, and simple engineering.
    Bricolage

    A Small School Table and Chair Made of Wooden Sticks

    By o42br — August 24, 2026
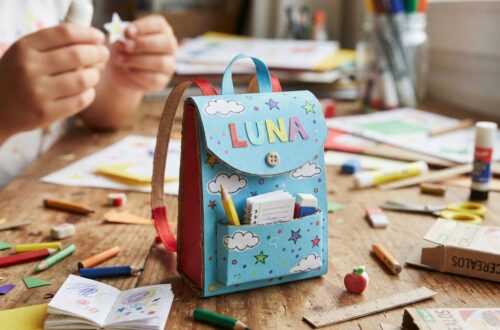
  • A Miniature Paper School Bag
    Créativité

    A Miniature Paper School Bag: A Creative and Educational Craft Project

    By o42br — August 24, 2026
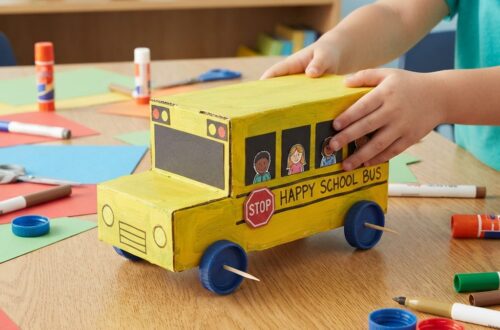
  • # How to Make a School Bus That Moves Using Cardboard Making a school bus that moves using cardboard is a fun, creative, and educational project for children. It combines arts and crafts with simple mechanical ideas, allowing students to build a small model vehicle from materials that are easy to find at home or in the classroom. The project can be made from an old cardboard box, paper, bottle caps, wooden sticks, glue, and other recycled materials. With a little imagination, an ordinary piece of cardboard can become a colorful school bus with wheels that actually move. This project is especially interesting because it is not only about decoration. A moving cardboard school bus introduces children to basic ideas about wheels, axles, balance, movement, and design. Children can learn how vehicles work while enjoying a hands-on activity. They can also customize their bus with windows, doors, seats, lights, a driver, and a school name. ## Understanding the Project A cardboard school bus is a miniature model of a real school transportation vehicle. The basic structure can be made from thick cardboard, while the wheels can be made from bottle caps, cardboard circles, or other round recycled materials. To make the bus move, the wheels need to be attached to axles that can rotate freely. The simplest design uses two axles passing underneath the body of the bus. Each axle connects two wheels. When the wheels turn, the bus can roll forward or backward. Children can make the bus move by pushing it gently with their hands. Older students can also explore simple mechanical methods, such as using a rubber-band mechanism or a small low-voltage motor under adult supervision. However, a hand-pushed model is often the easiest and safest version for younger children. ## Materials Needed The materials for this project are inexpensive and easy to find. The main material is strong cardboard. An old delivery box, cereal box, or packaging box can be reused for the bus body. Other useful materials include colored paper, scissors, glue, tape, a ruler, a pencil, markers, and crayons. Bottle caps can make excellent wheels because they are already round and strong. Alternatively, children can cut circles from cardboard. For the axles, straight wooden sticks, paper tubes, or sturdy straws can be used depending on the size of the model. Drinking straws can act as small axle holders, allowing the axle to rotate more easily. Additional decorations may include black paper, white paper, stickers, small pieces of foam, yarn, buttons, and recycled packaging materials. ## Planning the School Bus Before cutting the cardboard, it is helpful to make a simple plan. Children should decide how large the bus will be and where the wheels, windows, doors, and other parts will go. A rectangular shape works well for the main body. The front can be slightly rounded or slanted to make the bus look more realistic. The roof can remain flat, or another piece of cardboard can be shaped to create a curved appearance. The size of the wheels should also be considered during planning. If the wheels are too small, they may not support the bus properly. If they are too large, they can interfere with the body. Drawing the design first makes construction easier and reduces wasted cardboard. ## Building the Bus Body The bus body can be made from several pieces of cardboard. A large rectangular piece can form the main body, while smaller pieces can create the front, back, roof, and sides. A simple method is to cut one long piece with folding lines. The cardboard can then be folded into a box-like shape. Another method is to cut each wall separately and glue them together. The edges should be secured with strong tape or glue. Children should allow the glue to dry before adding heavy decorations. The body should be strong but not too heavy. A very heavy bus may make the wheels difficult to turn. ## Creating the Windows Windows give the cardboard school bus its recognizable appearance. Several rectangular windows can be drawn along both sides. Children can cut out the windows completely or simply draw them using a dark marker. If they want a more detailed model, transparent plastic from clean packaging can be attached behind the openings. Each window can contain a small paper passenger. This creates the appearance of children sitting inside the bus. The front windshield can be made slightly larger than the side windows. A rear window can also be added. ## Making the Wheels The wheels are one of the most important parts of the moving bus. Four wheels are enough for a simple model, although larger models can use six wheels. Bottle caps are a convenient choice because they are already circular. If bottle caps are unavailable, students can draw circles on cardboard using a cup or another round object as a guide. The circles can then be carefully cut out. The wheels should be approximately the same size. This helps the bus remain balanced. The wheels can be decorated with black paper or markers. Small white circles in the center can represent hubcaps. ## Creating the Axles The axles allow the wheels to rotate. Two straight sticks can be used, one for the front wheels and one for the rear wheels. Small pieces of drinking straw can be attached underneath the cardboard body. The axle is then passed through the straw. Because the straw is smooth inside, the axle can rotate more easily. The wheels are attached to the ends of the axle. They should be fixed securely but in a way that still allows the axle to rotate. This part of the project introduces an important mechanical idea an axle supports the wheels and allows them to turn together. ## Testing the Movement Once the wheels are attached, the bus should be tested before adding too many decorations. Place it on a smooth, flat surface and gently push it. If it moves forward smoothly, the basic mechanism is working correctly. If it turns to one side, one wheel or axle may not be aligned properly. If the wheels do not turn, the axle may be stuck against the cardboard. The holes may need to be adjusted, or the straw supports may need to be repositioned. Testing early is important because mechanical problems are easier to fix before the model becomes heavily decorated. ## Adding the School Bus Colors After the structure and wheels work properly, children can decorate the bus. Traditional school buses are often yellow, making yellow paper or paint a natural choice. However, children can create their own colorful designs. They might use blue, green, orange, or another color. The important thing is that the bus should be easy to recognize. A black strip along the side can make the model look more realistic. Black lines can also separate the windows. A school name can be written on the side. Children might invent a name such as “Happy School Bus” or use the name of their school. ## Adding Doors and Lights A small door can be drawn near the front or side of the bus. It can be made from cardboard and attached with tape so that it opens and closes. Headlights can be represented with small white or yellow circles. Red circles at the back can represent rear lights. A stop sign can also be added to the side of the bus. These small details help children understand the different safety features found on real vehicles. ## Creating a Miniature Driver and Passengers The bus becomes more interesting when it has people inside. Children can draw small passengers on paper and cut them out. The driver can sit at the front behind the windshield. Several children can be placed behind the driver. For a three-dimensional effect, tiny cardboard seats can be made inside the bus. If the side windows are open, viewers can see the passengers sitting inside. This part of the project can also encourage storytelling. Children can imagine where the bus is going and create a story about the students traveling to school. ## Making the Bus Move in Different Ways The simplest moving cardboard school bus is pushed by hand. This is ideal for younger children and requires no complicated equipment. Another possibility is a rubber-band-powered mechanism. A rubber band can store energy when it is twisted and can release that energy to turn an axle. This design requires careful construction and adult assistance. Older students can experiment with a small battery-powered motor designed for educational projects. A motor can turn the wheels and make the bus move without being pushed. When using batteries, wires, motors, or electrical components, children should work with an adult and use only safe, low-voltage educational equipment. ## Learning Through the Project The moving cardboard school bus is more than a craft. It can become a simple science and engineering lesson. Children learn that wheels reduce friction and make transportation easier. They discover that an axle connects wheels and helps them rotate. They also learn that balance and alignment are important when building a moving object. The project introduces children to engineering design. They make a plan, build a model, test it, identify problems, make changes, and test it again. This process teaches an important lesson mistakes are part of learning. If the first version does not move correctly, children can investigate the problem and improve the design. ## Environmental Benefits of Cardboard Crafts Using cardboard for the school bus also encourages recycling. Instead of throwing away packaging, children can reuse it as a building material. This teaches an important environmental message. Many household objects can have a second life when people use creativity and imagination. Reusing cardboard also makes the project inexpensive. Families and schools do not need to purchase special construction materials. The activity can therefore combine creativity, science, and environmental education in one project. ## Turning the Project Into a Classroom Activity Teachers can turn the cardboard bus into a larger classroom challenge. Students can work individually or in small groups to create different buses. Each group can test how far its bus travels when pushed with the same amount of force. Students can measure the distance and compare the results. They can also experiment with different wheel sizes, axle positions, and bus weights. This turns a simple craft into an introduction to scientific observation and fair testing. Students can record their results and discuss why some designs moved farther than others. ## Safety During Construction Safety should always be considered when making cardboard crafts. Scissors should be used carefully, and younger children may need adult assistance when cutting thick cardboard. Hot glue guns should only be used by adults or under close adult supervision. Children should also avoid sharp tools and unsafe electrical components. The work area should be clean and organized. Small pieces of cardboard, glue, and other materials should be removed when the project is finished. ## Conclusion A school bus that moves using cardboard is an exciting project that brings together creativity, recycling, science, and simple engineering. Starting with an ordinary piece of cardboard, children can create a miniature vehicle with a body, windows, wheels, axles, seats, passengers, and decorations. The moving feature makes the project especially enjoyable because children can test their creation instead of simply looking at it. They can push the bus across a table, observe how the wheels turn, identify problems, and improve the design. The project also teaches valuable skills. Children practice measuring, cutting, folding, gluing, decorating, planning, and problem-solving. They learn that successful construction requires patience and testing. Most importantly, they discover that science and creativity can work together. A cardboard school bus can become much more than a small toy. It can be a classroom science experiment, an art project, a recycling activity, or a demonstration of basic mechanical principles. With simple materials and a little imagination, children can transform recycled cardboard into a fun moving vehicle while learning important lessons about design, motion, teamwork, and responsible use of materials.
    Bricolage

    How to Make a School Bus That Moves Using Cardboard

    By o42br — August 24, 2026
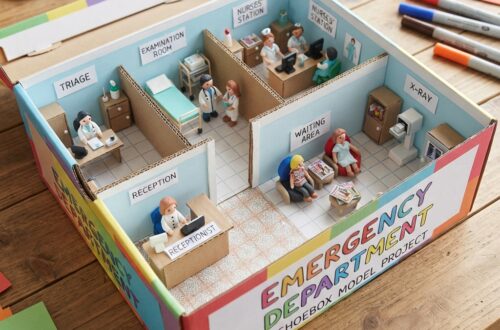
  • The Model of a Department Inside a Shoebox
    Activités

    The Model of a Department Inside a Shoebox

    By o42br — August 24, 2026
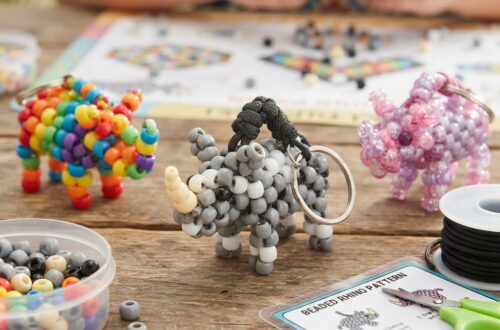
  • A Beaded Rhinoceros Craft for Children
    Activités

    A Beaded Rhinoceros Craft for Children

    By o42br — August 18, 2026
  • A Small Mouse Made of Beads for Children
    Bricolage

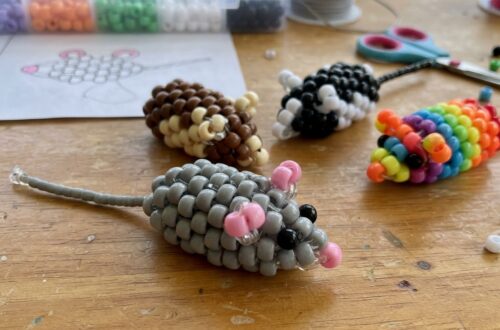
    A Small Mouse Made of Beads for Children

    By o42br — August 18, 2026
  • A Rabbit Made with Beads for Children
    Bricolage

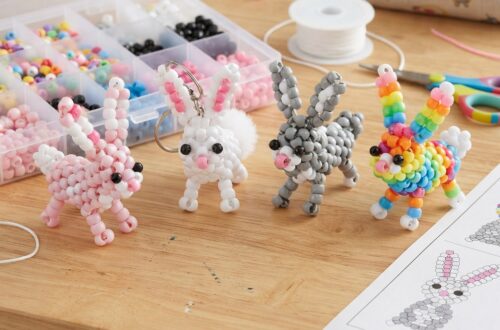
    A Rabbit Made with Beads for Children

    By o42br — August 18, 2026
  • A Fox Made with Beads for Children
    Uncategorized

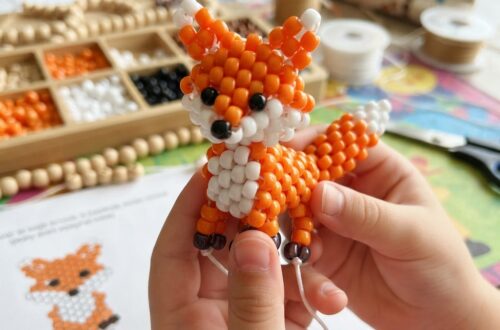
    A Fox Made with Beads for Children

    By o42br — August 18, 2026
  • A Beaded Bear Craft for Children
    Activités

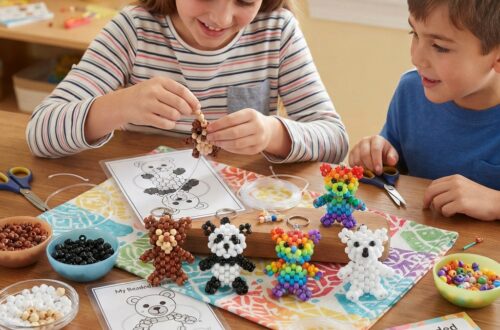
    A Beaded Bear Craft for Children

    By o42br — August 18, 2026
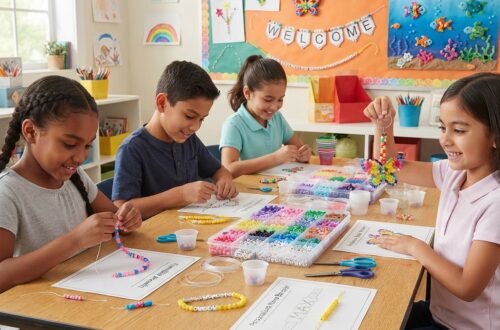
  • Creative Beadwork Projects for School
    Activités

    Creative Beadwork Projects for School

    By o42br — August 18, 2026
 Older Posts
Newer Posts 

Recent Posts

  • A Memory Game Using Letters and Pictures: A Fun Educational Activity
  • The Educational Number Wheel: A Fun and Interactive Learning Tool
  • A Cartoon Word Puzzle: A Fun and Educational Learning Activity
  • The School Question Cube: A Fun and Educational Learning Activity
  • The Word Shooting Game: A Fun and Educational Learning Activity

FOTAR

  • Home
  • Termes et conditions
  • Politique de confidentialité
  • DMCA
  • Politique de Confidentialité des Cookies
  • CCPA
  • CONTACTEZ-NOUS
  • À PROPOS DE NOUS
Graceful Theme by Optima Themes